
The Most Beautiful Braided Apple Pie
Want a show-stopping dessert that actually tastes like real fruit? In this video, I’m sharing my secrets for the Most Beautiful Apple Pie you’ll ever make. We are skipping the heavy sugar and letting the natural sweetness of the apples shine!I’ll show you my simple 3-strip braiding technique that looks professional but is easy enough for beginners. Plus, don't miss my "No-Soggy-Bottom" trick—removing the pie from the pan to get that perfect golden crunch on the bottom!Impress your friends and family with this gorgeous Braided Apple Pie! with my simple 3-strip braiding method and cookie-cutter hacks, anyone can make a professional-looking pie at home.
Yield: 12 people
Calories: 385kcal
Cost: $12
Equipment
- 1 Pie Pan
- 1 Pan
Materials
- 7-8 Sweet Apples I use Envy and Honeycrisp
- 1/2 teaspoon of Cinnamon
- 1 Tablespoon of Orange Jam
- 4 oz Apple Sauce
- 2 Teaspoons of Cornstarch
- Pie Crust Ingredients:
- 3 cups all purpose flour
- 2 sticks or 1 cup Butter or vegan Butter
- 1/2 tablespoon salt
- 2 tablespoons sugar
- 1/4 cup to 1/2 cup cold water
Instructions
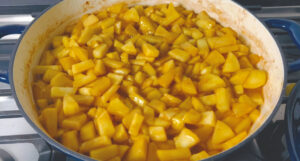
- I use 7–8 sweet apples since I'm not adding any sugar. After peeling and cutting them into small pieces, cook the apples in a pan.
- Add Cinnamon ( about 1/2 teaspoon)
- Add Apple Sauce (4 oz)
- Add 1 Tablespoon of Orange Jam
- Add the cornstarch mixture (2 teaspoons cornstarch mixed with 1/4 cup water)
- Cook for 10 minutes on low heat
- Once the apple filling is ready, let it cool completely before adding it to the pie pan.
- I'm using my homemade pie crust; you can find the recipe on my website "2 Minutes Vegan Pie Crust" .
- Divide the dough in half. Use the first half for the bottom crust and the second half for the decorative lattice or top crust.
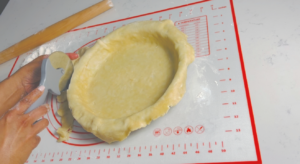
- Once you have rolled it out large enough to fit the pie pan, easily remove the dough from the mat by rolling it around your rolling pin. Then, gently transfer it to the pie pan lined with parchment paper.
- Trim away the excess dough.
- Tuck the edges of the pie dough under to create a neat border. We prefer a thinner edge, but if you like a thicker crust, simply leave the excess dough untrimmed and fold it over itself to create more volume.
- Prick the bottom of the crust all over with a fork to prevent it from puffing up while baking.
- Once the bottom of the pie is ready, let it rest in the fridge until you are ready to add the filling.
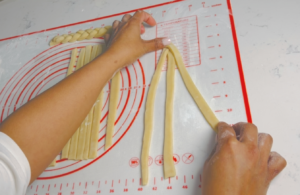
- Now, take the second portion of the dough and create the decorative top crust. Roll out the dough into an even rectangle. Cut it into strips of whatever thickness and width you prefer.
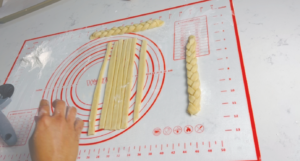
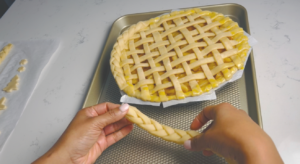
- To create the braid, simply take three strips of dough and fold them toward the middle, alternating from right to left, just as shown in the video.
- Repeat this process until the braid is long enough to cover the entire edge of the pie.
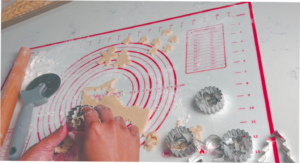
- Roll out the excess dough thinly and use cookie cutters to create any designs you like. These are perfect for covering the areas where the braids connect.
- Rest in the fridge until you are ready to use.
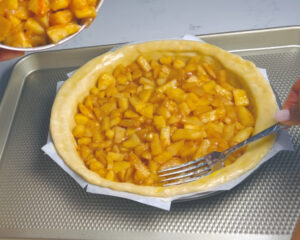
- It’s time to fill the pie! Brush the edges with egg wash, then pour in your apple filling.
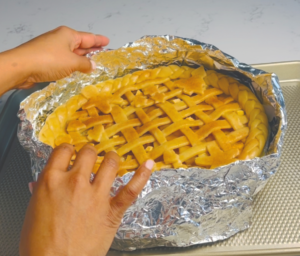
- Now, decorate the top of the pie with any design you like! I’m creating a lattice pattern, just as shown in the video.
- Trim away any excess dough and tuck the edges under to create a neat, clean look.
- I like to remove the entire pie from the pan before serving, so using parchment paper makes it much easier to lift out safely.
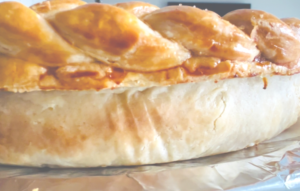
- Now, brush the edges with egg wash and carefully place your braids all the way around the rim.
- Brush the entire pie with egg wash.
- Cover the areas where the braids connect with the decorative dough shapes you cut out earlier. Feel free to arrange them in any design you like!
- Brush the entire top with egg wash for that perfect golden glow, and it’s finally ready to bake!
- This step is optional, but adding a few tiny chunks of butter on top of the filling will really enhance the wonderful flavor.
- Another optional step: Sprinkle a cinnamon-sugar mixture on top to enhance the holiday aroma and add a touch of sweetness. Simply mix one teaspoon of sugar with one teaspoon of cinnamon.
- Cover the edges of the pie with aluminum foil to prevent them from burning during the 45-minute bake time.
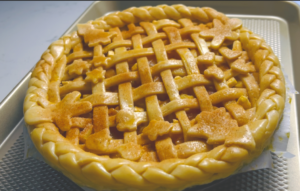
- Place the pie in a preheated oven and bake at 425°F for 15 minutes. Then, reduce the heat to 375°F and continue baking for another 30 minutes until the crust is a deep golden brown.
- After 45 minutes, the pie is almost ready! For a truly professional finish, I like to carefully lift the pie out of the pan using the parchment paper and bake it directly on the oven rack for an additional 15 minutes. This ensures the bottom crust is just as golden and crisp as the top.
Video
Notes


 Note: Nutrition information is an estimate and may vary depending on ingredients and preparation.
Nutrition
Serving: 1serving (1/12th of the pie) | Calories: 385kcal | Carbohydrates: 58g | Protein: 3g | Fat: 16g | Saturated Fat: 9.6g | Trans Fat: 0.5g | Cholesterol: 41mg | Sodium: 312mg | Potassium: 143mg | Fiber: 5g | Sugar: 24g | Vitamin A: 525IU | Vitamin C: 4.2mg | Calcium: 18mg | Iron: 1.6mg